In this guide, we’ll take you through the steps for creating a Reputation Manager report.
If you prefer to learn by watching videos, check out our free course in BrightLocal Academy that shows you how to set up and understand a Reputation Manager report 👇
1. Initial Setup
There are two ways to create a new Reputation Manager report.
Click on 'Reputation Manager' in the Top Menu to open the Reputation Manager overview page, which will display a list of all existing reports.
Next, click the green 'Add New' button.
Alternatively, you can create a Reputation Manager report from a Location Dashboard.
From 'All Locations', click the green 'View' button to access the dashboard of the Location for which you'd like to create a Reputation Manager report.
Once the Location is open, the Location sidebar menu will be visible on the left — this shows a list of all the existing reports for your Location.
Click 'Reputation' in this menu, and then select 'Review Insights' to begin setting up your Reputation Manager report.
You will now see a popup asking whether you want to monitor all of your data at once, or reviews only. If you want to set up multiple reports, you can select ‘Monitor All My Data’.
In this guide we’ll be focusing on Reputation Manager reports only, so just click the option on the right for now (you can always come back and choose to monitor more data later).
2. Report Settings
General Settings
If you're creating a new campaign from the Reputation Manager Overview page, you'll need to pick a Location from the dropdown menu.
If, however, you're setting up a report for an existing Location (from within the Location Dashboard), this information will already be populated for you.
Which location is this report for?: Here, you can select the location for this Reputation Manager Report — it will be auto-completed if the Location already exists.
How often do you want this report run?: Two options are available to you from the dropdown arrow to the right of the field, as follows:
- Weekly Schedule: Select which day of the week you’d like the report to run
- Monthly Schedule: Select which day of the month you’d like the report to run
Business Details
This section of the report will be auto-populated. Check the information to make sure it's correct. If anything needs changing, click the 'Update in Location settings' link.
3. Connect Your Google Business Profile and Facebook Page
The next step is to connect your Google Business Profile and Facebook page to get daily reviews, and to respond to reviews from within the report. Connecting your GBP account to BrightLocal will also ensure you see more accurate data in your reports.
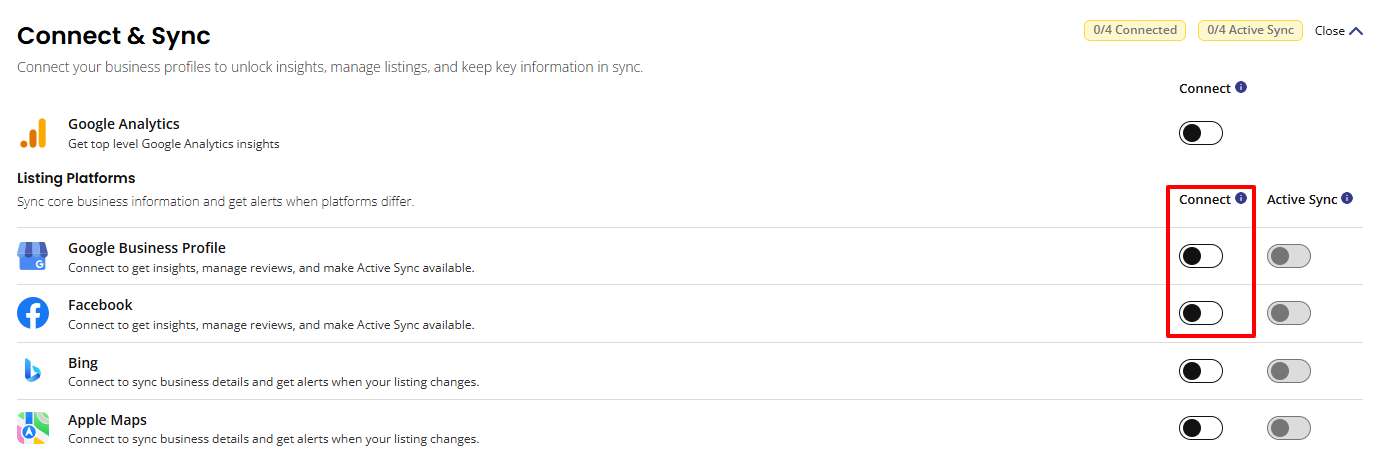
Click the 'Connect' button.
On the next page select the connect toggles for Google Business Profile and Facebook, then follow the instructions to get connected.
4. Select Sites to Track Reviews
In this section, you can select which sites you wish to track reviews on. For more details on which sites we track in Reputation Manager, visit this page.
To select all of the sites simply click the checkbox at the very top.
To select individual sites, click the checkboxes beside the ones that you want.
Once you have selected which sites you want to track, simply click the 'Find my Listings' button to identify listings on the selected sites.
After you click the ‘Find My Listings’ button, BrightLocal perform a real-time lookup to identify live listings on these sites. We will then display the links to your listings on these sites. You can then check these links and approve these if they are correct. If the correct link has not been found, please paste in the correct link.
5. Receive Email Alerts
Here, you can set up the notifications you’d like to receive once the Reputation Manager report has completed. You can add up to five email addresses to receive notifications — if you don’t want to receive any notifications, just select ‘No’ in the dropdown menu.
Selecting 'Yes' will give you the following two options:
Yes, every time report finishes: Email notifications are sent out once a report has completed.
Yes, but only when new reviews were found: Email notifications will not be sent unless new reviews have been found since the last report.
6. Running / Saving Reports
At the bottom of the report, you will see the green 'Run Report' button (shown below within the red box) — click this to run the report, which will then be saved to the Location Dashboard.
7. After the Report is Run
Once your Reputation Manager report has completed, there are several further actions you can take with the data — you can access these by clicking on the 'Actions' dropdown (indicated below by the red box).
Edit Report Settings: This takes you to the 'General Settings' of the report, where you can make your desired updates.
View External Report: Click this to open the interactive report in a new tab of your internet browser, with all mentions of BrightLocal removed, including in the URL — this is ideal for sharing with your clients and colleagues when showcasing local marketing progress.
Discover more about white-label reporting and external reports here.
If you're new to reviews, check out this free course in Brightlocal Academy - A Beginner's Guide to Generating and Managing Reviews.
Comments
0 comments
Please sign in to leave a comment.